Braised Chicken in the Oven with Crispy Skin Recipe
Few dishes combine tenderness and crunch as perfectly as oven-braised chicken with crispy skin. Braised Chicken in the Oven with Crispy Skin recipe is a harmonious blend of juicy, flavorful chicken cooked to perfection and topped with a golden, crispy exterior that’s sure to impress your family and guests alike.
Braising is a time-honored cooking technique that enhances the natural flavors of the chicken while keeping it moist and tender. By using the oven, you achieve an evenly cooked dish with a beautifully crisp skin that’s as satisfying to the eyes as it is to the palate.
Whether you’re looking for a comforting dinner idea or a standout dish for a special occasion, this braised chicken recipe is a must-try. With simple ingredients like fresh herbs, aromatic vegetables, and a splash of chicken stock, you can create a restaurant-quality meal right in your own kitchen. Let’s dive into this foolproof method for making braised chicken in the oven with irresistibly crispy skin!
Table of Contents
Why Braising is the Secret to Perfect Crispy Chicken Skin
Braising is a versatile and time-tested cooking method that brings out the best in chicken. It’s a two-step process that starts with searing the meat to lock in flavors and create a crisp, golden skin, followed by slow cooking in liquid to make the chicken tender and juicy. This method not only enhances the flavor but also ensures that the chicken stays moist, even after prolonged cooking in the oven.
The Science Behind Braising
When you sear chicken at high heat, the Maillard reaction occurs—a chemical process that browns the surface of the meat, giving it a rich, savory flavor and that sought-after crispy texture. This step is crucial for creating the perfect skin that’s crispy and golden.
The second step, slow cooking in a flavorful liquid, allows the chicken to absorb moisture and infuse with the aromatics in the pot. The liquid, whether it’s chicken stock, white wine, or a combination of both, acts as a gentle cooking medium, breaking down the connective tissues in the meat and making it incredibly tender.
Why the Oven is Ideal for Braising
While braising can be done on the stovetop, the oven provides an even, consistent heat that surrounds the chicken from all sides. This ensures that the meat cooks uniformly and avoids hotspots that can dry out certain areas. Additionally, once the chicken is nearly cooked, uncovering the pot and increasing the oven temperature allows the skin to crisp up without overcooking the meat beneath.
Crispy Skin Without Compromise
One of the challenges in many chicken recipes is achieving crispy skin without drying out the meat. Braising solves this dilemma by keeping the chicken submerged in liquid for most of the cooking time, ensuring it remains moist. When the final crisping step is done, the skin becomes beautifully golden and crunchy, providing a satisfying contrast to the tender meat inside.
Flavorful Layers in Every Bite
Braising is also a fantastic way to layer flavors. The initial searing step caramelizes the surface of the chicken, while the liquid and aromatics in the braising mixture enhance the overall taste. Fresh herbs like rosemary and thyme, along with garlic and onions, infuse the meat and sauce, creating a dish that is rich, complex, and irresistibly aromatic.
Whether you’re cooking for a weeknight dinner or entertaining guests, braising is the secret weapon to delivering a meal that is both hearty and refined. With this method, you’ll master the art of creating crispy-skinned chicken that’s as impressive as it is delicious.
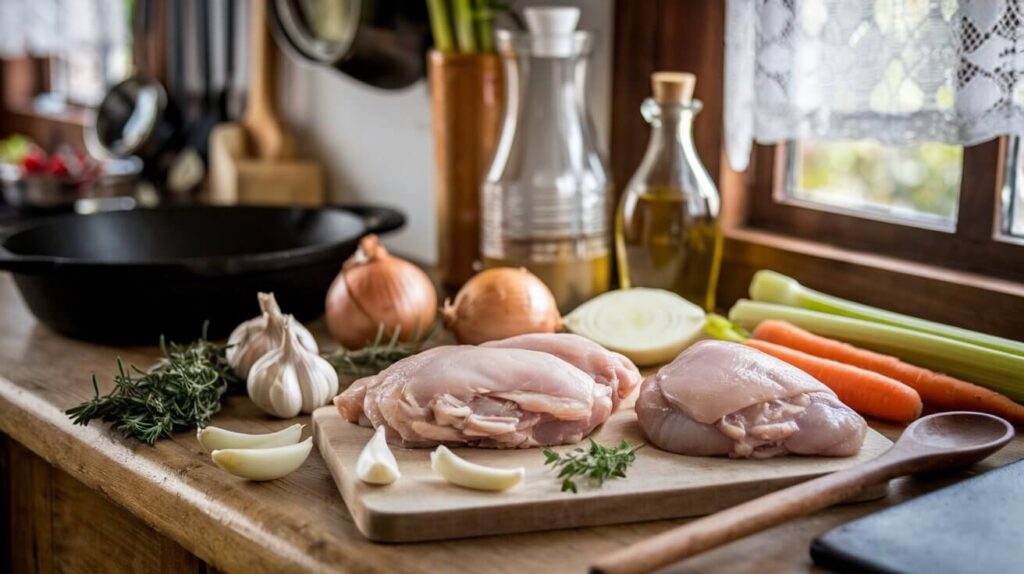
Ingredients You’ll Need for Braised Chicken in the Oven
The secret to a truly flavorful and crispy braised chicken dish lies in the quality and combination of ingredients. Each element in this recipe plays a vital role in enhancing the taste, texture, and overall appeal of the dish. Here’s a detailed breakdown of what you’ll need and why these ingredients matter.
1. Chicken Pieces (Thighs, Breasts, or Legs)
Choose bone-in, skin-on chicken pieces for the best results. The bones help retain moisture during cooking, while the skin crisps up beautifully during searing and finishing. Chicken thighs are especially popular for braising because they remain tender and juicy even after long cooking times. However, breasts or drumsticks can also work if you prefer.
2. Olive Oil or Butter
A high-quality olive oil or butter is essential for searing the chicken. This step not only creates a crispy, golden skin but also forms a flavorful base for the dish. Butter adds a rich, creamy undertone, while olive oil provides a slightly lighter, aromatic touch.
3. Aromatics (Garlic, Onions, Shallots)
Aromatics are the foundation of the dish’s flavor. Garlic cloves, sliced onions, and shallots release their natural sweetness and earthy flavors when cooked, enhancing the chicken and the braising liquid. These ingredients also deepen the aroma and complexity of the final dish.
4. Fresh Herbs (Thyme, Rosemary, Bay Leaves)
Herbs are the unsung heroes of any braised dish. Thyme and rosemary lend a fresh, woodsy aroma, while bay leaves add a subtle depth to the braising liquid. Using fresh herbs is recommended for their vibrant flavors, but dried versions can also work in a pinch.
5. Chicken Stock or Broth
A good-quality chicken stock or broth is crucial for braising. It provides a rich, savory base that keeps the chicken moist during cooking. Opt for a low-sodium variety to control the saltiness of the final dish and allow the natural flavors of the chicken and aromatics to shine.
6. Dry White Wine (Optional)
For an added layer of flavor, consider using a dry white wine to deglaze the pan after searing the chicken. The acidity in the wine balances the richness of the dish, while its subtle fruity notes enhance the overall taste. If you prefer not to use alcohol, you can substitute with more chicken stock or a splash of apple cider vinegar.
7. Vegetables (Carrots, Celery, Potatoes)
Adding vegetables to the braising pot creates a complete, one-pot meal. Carrots and celery contribute a sweet and earthy flavor, while potatoes make the dish heartier. These vegetables absorb the braising liquid, becoming tender and delicious by the end of cooking.
8. Salt, Pepper, and Spices
Seasoning is key to bringing out the natural flavors of the chicken and other ingredients. A simple blend of salt and freshly cracked black pepper works wonders, but you can also add spices like paprika or smoked paprika for an extra kick.
9. Optional Add-Ins for Extra Flavor
- Lemon slices or zest: Add a hint of brightness and acidity.
- Crushed red pepper flakes: For a subtle heat.
- Soy sauce or Worcestershire sauce: To add umami depth.
Why These Ingredients Work Together
The combination of these ingredients creates a balanced dish that’s rich in flavor, tender in texture, and visually appealing. The chicken becomes juicy and succulent during braising, while the skin crisps up to perfection. The vegetables, herbs, and aromatics enhance the dish with layers of taste, making every bite a delightful experience.
Stock up on these essentials, and you’ll be ready to create a braised chicken dish that’s sure to wow your family and guests!
Step-by-Step Recipe for Braised Chicken with Crispy Skin
Creating the perfect braised chicken with crispy skin involves a series of simple yet essential steps. Each stage is designed to build layers of flavor, achieve an irresistibly crispy skin, and ensure the chicken remains tender and juicy. Follow this detailed guide to master the technique:
Step 1: Prepare the Chicken
- Pat Dry: Start by patting the chicken pieces dry with paper towels. This step is crucial for achieving a crispy skin, as moisture prevents proper browning.
- Season Generously: Season the chicken on both sides with salt, pepper, and your choice of spices. Paprika, garlic powder, or even a hint of cayenne pepper can add an extra depth of flavor.
Step 2: Sear for Crispy Skin
- Heat the Pan: Heat a large cast-iron skillet, Dutch oven, or heavy-bottomed pan over medium-high heat. Add olive oil or butter and let it heat until shimmering.
- Sear the Chicken: Place the chicken pieces skin-side down in the pan, being careful not to overcrowd them. Sear for 4–5 minutes without moving them, allowing the skin to turn golden and crisp.
- Flip and Sear: Turn the chicken over and sear the other side for 2–3 minutes. Remove the chicken from the pan and set it aside.
Step 3: Build the Flavor Base
- Cook the Aromatics: Add diced onions, minced garlic, and sliced shallots to the same pan. Sauté until softened and fragrant, about 2–3 minutes.
- Deglaze the Pan: Pour in dry white wine or a splash of chicken stock to deglaze the pan, scraping up the browned bits from the bottom. These bits are packed with flavor and will enrich the dish.
Step 4: Add the Braising Liquid and Chicken
- Pour in the Liquid: Add chicken stock, ensuring the liquid comes about halfway up the sides of the chicken. This keeps the meat moist while allowing the skin to remain exposed for crisping later.
- Add Herbs and Vegetables: Toss in sprigs of thyme, rosemary, bay leaves, and any vegetables like carrots, celery, or potatoes. These will absorb the braising liquid and complement the chicken.
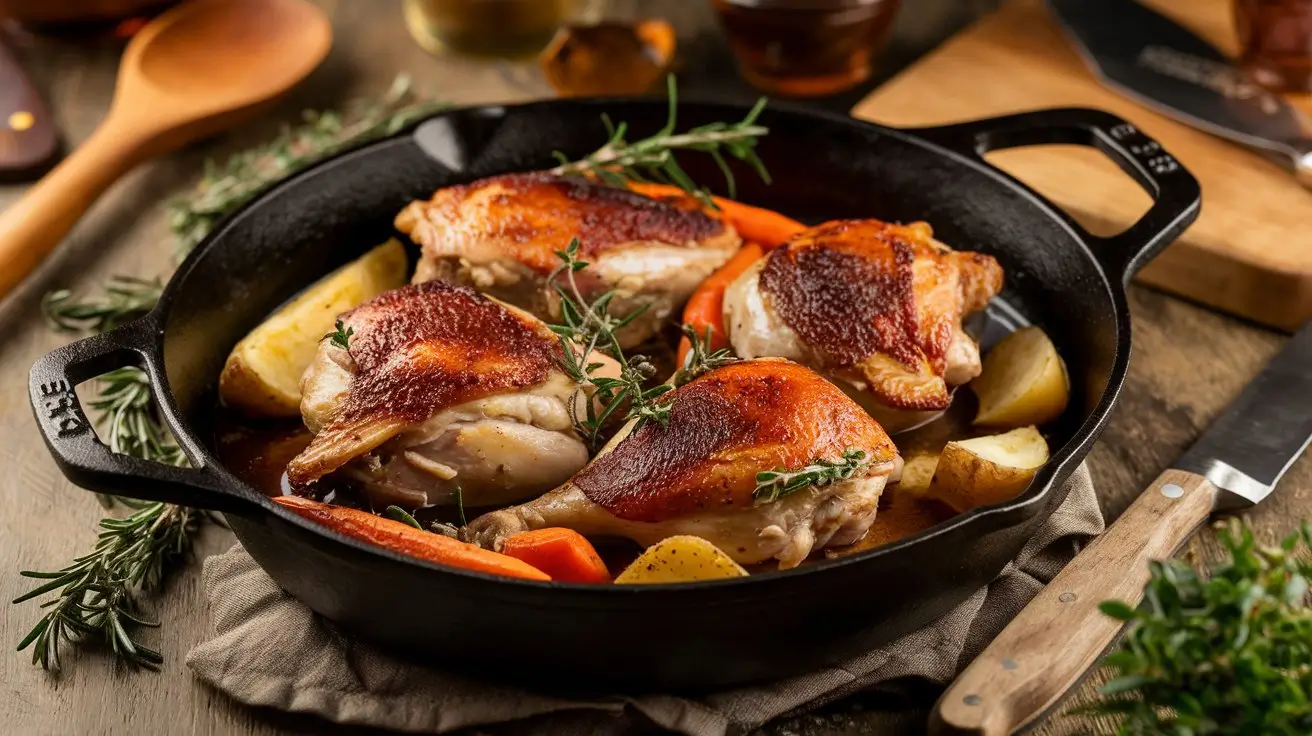
Step 5: Braise in the Oven
- Cover and Cook: Preheat your oven to 350°F (175°C). Cover the pan or Dutch oven with a tight-fitting lid and transfer it to the oven. Braise for 25–30 minutes, or until the chicken is cooked through and tender.
- Uncover and Crisp the Skin: Remove the lid and increase the oven temperature to 425°F (220°C). Let the chicken bake uncovered for an additional 10–15 minutes, or until the skin is beautifully crisp and golden.
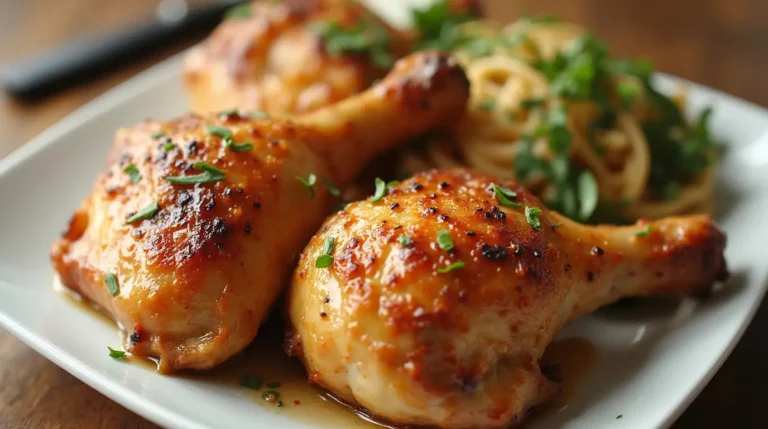
Step 6: Finish and Serve
- Garnish: Remove the chicken from the oven and let it rest for 5 minutes. Garnish with freshly chopped parsley or a sprinkle of lemon zest for a pop of color and brightness.
- Serve: Plate the chicken alongside the braised vegetables and spoon some of the flavorful sauce over the top. Pair it with crusty bread, rice, or mashed potatoes to soak up the delicious juices.
Tips for Perfect Results
- Use Skin-On Chicken: The skin is essential for achieving that crispy, golden finish.
- Don’t Skip Searing: This step locks in the juices and ensures a rich, caramelized flavor.
- Balance Your Liquid: Too much liquid can make the chicken soggy, while too little may dry it out. Aim for about halfway up the chicken.
- Adjust Seasonings: Taste the braising liquid halfway through cooking and adjust with salt, pepper, or a splash of vinegar if needed.
By following these steps, you’ll create a braised chicken dish with tender, flavorful meat and a crispy, irresistible skin that will have everyone asking for seconds!

Final Thoughts on Braised Chicken in the oven with crispy skin recipe
Braised chicken in the oven with crispy skin is a dish that beautifully marries simplicity with sophistication. It’s a recipe that transforms everyday ingredients into a show-stopping meal, making it perfect for both weeknight dinners and special occasions.
This recipe showcases the best of braising, a timeless cooking technique that delivers tender, juicy chicken while ensuring the skin remains irresistibly crispy. By combining proper searing, aromatic ingredients, and an oven-braising method, you can create a dish that’s rich in flavor and texture. The fresh herbs, vegetables, and savory braising liquid infuse the chicken with a depth of taste that’s hard to beat, while the crispy golden skin provides the perfect finishing touch.
Why You’ll Love This Recipe
- Effortlessly Delicious: With just a few simple steps, you can achieve restaurant-quality results in your own kitchen.
- Versatile: This recipe works with different cuts of chicken and allows you to customize the flavors with your favorite herbs and spices.
- A Complete Meal: The braising liquid doubles as a savory sauce, while the added vegetables make this a one-pot meal that’s hearty and satisfying.
Tips for Success
- Don’t rush the searing process—this is the key to achieving that crispy, golden skin.
- Experiment with different herbs and seasonings to make the dish uniquely yours.
- Serve the chicken with sides that soak up the flavorful sauce, such as mashed potatoes, rice, or crusty bread.
Now that you have all the steps and tips to master this recipe, it’s time to bring it to life in your kitchen. Try making this braised chicken in the oven with crispy skin recipe and let it become a staple in your meal rotation. Share your results with family and friends, and don’t forget to leave a comment or photo on our blog—we’d love to hear how it turned out for you!
If you enjoyed this recipe, be sure to subscribe to our newsletter for more mouthwatering chicken recipes, tips, and cooking inspiration. Happy cooking!
Hungry for More Chicken Recipes?
Don’t let the deliciousness end here! Check out some of our favorite recipes that are easy to make and bursting with flavor. Your next favorite dish is just a click away!